This time I will talk a little bit about chocolate, as you may have noticed there are different types of chocolate. Not only do we have to choose between so many brands, but we also have to look at the percentage of chocolate.
That’s why I’m not talking about those delicious chocolate bars that they sell ready to eat!
I mean the chocolate that we have to choose to make a dessert or cover some fruit or to make delicious chocolate truffles. This is a delicious and interesting topic, especially for chocolate lovers who enjoy working with it.
If you are just starting out on this chocolate journey, I hope this information is useful. And if you are already in the middle of this path I hope you find new and helpful information in this blog.
Well, it turns out that I love working with chocolate much more than eating it. It’s not that I don’t like it but for some reason I find more satisfaction seeing my finished work and seeing people’s faces when somebody is trying something I made by myself.
Now, I am making some chocolate truffles. For this, I have to choose the type of chocolate that will work best, usually a semi-sweet chocolate is used, which is especially important if you want to put a sweet filling inside. But you can always use a sweeter chocolate. When properly tempered!
Well, let’s start by talking a little about the percentages of chocolate.
As a curious fact, I have to tell you that for it to be considered chocolate it must have at least 35% cocoa to be able to call it chocolate.
What does this mean?
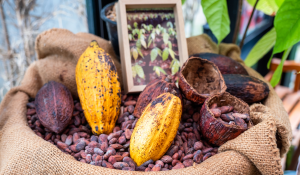
Well, it turns out that to make chocolate cocoa is needed. The process used to obtain cocoa is very interesting. Since the cacao seed is harvested from the cacao tree, which are also called pods. Inside it are the cacao beans.
There are several types of cocoa but there are three most common which we will talk about. 
CRIOLLO CACAO: It is the variety of cocoa consumed by the Mayans. It is considered the best tasting and has a very particular aroma. This is the best quality but sadly they are very rare.
FORASTERO CACAO: It is a wild variety of Criollo cacao originating from the Amazon jungle. It has a more bitter taste and is the most common cocoa: 90% of the cocoa currently grown in the world belongs to this variety.
TRINITARIO CACAO: were produced by hybridization of Criollo and Forastero type cacao varieties. It combines part of the typical flavor of Criollo Cocoa with the resistance of the Forastero.
Well, it turns out that when the fruit is ripe it is harvested. The seed is extracted and spread on banana leaves, some growers spread it in the same cocoa seedlings and cover the seeds to leave them there for 3 to 7 days to ferment. During fermentation heat is released while the pulp disintegrates. During this process the seed turns from violet to light brown and the bitterness decreases and the flavor that the chocolate will have begins to emerge.
Since the fermented seeds are washed and spread out in the sun to dry, the drying process takes 7 to 10 days. During this time, its aromas become concentrated and its color darkens.
After drying it, they are roasted,then the shell is removed and cracked from there we obtain the Cocoa Nibs.
It continues to grind until obtaining the cocoa paste, this paste continues to be pressed until it is heated and the paste separates the cocoa then cocoa butter. And there begins the magic of chocolate!
At this point each chocolate company uses the percentages and they add ingredients to make their own brand of chocolate.
Well Now We Can Talk About Percentages.
It turns out that chocolates most common ingredients are:
- cocoa
- cocoa butter
- Sugar
- Lecithin
Why am I mentioning them? Well later you will see that these ingredients are important.
By the way, for those who do not know what lecithin is used for, in industrial chocolate shops soybean or sunflower lecithin is an emulsifier added to chocolate to help bind the cocoa solids, sugar and milk so they stick to the cocoa butter. Its main function is to give fluidity to the chocolate, so it molds better. ( Lecithin is a nutrient derived from soybeans and sunflowers. )
In my search for this information, I found an interesting article. Where he explains that there are some people who are looking for products without lecithin, since lecithin is an allergen, and for obvious reasons they look for products without it. Well, here it tells us that for those concerned about allergens, Agostoni chocolate items with No Added Emulsifier (NAE), i.e. no soy lecithin. These products simply have more cocoa butter added to maintain the correct viscosity.
Also, all soy lecithin in Agostoni chocolate is non-GMO. In fact, Agostoni does not use genetically modified ingredients in any of their chocolate and cocoa products. I’m not trying to sell you this product, I just thought of an interesting fact that might help some of you!
It Turns Out That We Have:

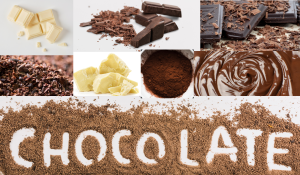
White Chocolate: This “chocolate” does not have cocoa, it only has Cocoa Butter. So if we remember the rule from the beginning, to be able to call it chocolate they need to have 35% cocoa… Well, that’s right, this is not chocolate! Obviously there are always ways around the rule and in this case if the chocolate has a minimum of 20% cocoa butter and a maximum of 50% sugar….. Bingo! Now there is White Chocolate lol.
Milk Chocolate: For chocolate to be called this, it must have 35% to 40% Cocoa and Cocoa Butter and thus the other 60% is milk and sugar.
Semisweet Chocolate: This has 60% to 70% cocoa and cocoa butter but is allowed to have 40% cocoa. The other 30% more or less are sugars and a minimum of Lecithin.
Dark Chocolate: From 80% to 90% cocoa.
Very Dark Chocolate: that has 100% cocoa.
And Well, the aforementioned Cocoa Nibs: Remembering that these come out after the grain is toasted and crushed.
So, since we have talked a little about the different types of chocolates and their percentages, we can make it clear that the percentage refers to the percentage of cocoa and/or the amount of cocoa butter that each chocolate contains, and the rest percentage varies depending on the brand of chocolate, they put sugars and milk to the percentage so that their recipe is unique.
Now let’s talk about Dipping Chocolates (Cover or Fake Chocolate). This chocolate is the one we use to cover fruits or make chocolate figures. We do not need to temper it since it is made for that purpose.
Well, it turns out that you can find this kind of chocolate in colors too. But they don’t make it with real cocoa, so they put it chocolate flavored and it’s made with vegetable shortening.
Although this type of “chocolate” offers the ease of being able to use it for coverage without tempering it, I would not recommend using it for anything else. Since in other recipes real chocolate is needed, if you use this type of chocolate the flavor will not be the best.
Speaking of tempering the chocolate…
What is the importance of knowing this?
Well if you are interested in making decorations with real chocolate or chocolate truffles or chocolate covered strawberries for example, you need to know the correct temperature to bring the chocolate to. Once you do it and the chocolate cools completely, it has that well known shine and crunchy characteristic that chocolate is known for. If we do not do this, even if we let the chocolate cool down, it will not have that crunch and it will begin to melt when touched. Here is where we realize that it was not tempered correctly.
So what does it mean to temper chocolate?
Well, it turns out that in order to handle the chocolate and keep it with its properties when it hardens, like the crunch and shine we have to temper it.
Because inside the chocolate there are many different crystals and the crystal that helps us to make this happen is called Beta Crystal. When we heat the chocolate and then lower its temperature quickly, we make more Beta Crystals come out than the others and thus we will be able to stabilize it and that has a perfect consistency.
And what is temper and how do you temper chocolate?
Well, there are 3 technical techniques that are usually used to do this and 1 that can be good to start your journey with chocolate.
For all the methods, the first step is to melt our chocolate either in a bain-marie or in the microwave.
The bain-marie is when you put a pot with a little water on the stove to heat. Then you put a ball on top of it where you place your chocolate to melt. When the water is hot it will release steam that will touch the ball with the chocolate. As the container heats up, it will begin to melt the chocolate slowly.
Make sure of two things; The first is that the water is not boiling, because it can burn your chocolate. And of course you have to stir it from time to time until it is incorporated.
And two, no less important. Make sure that the steam or bowl is not touching the water and the water cannot in any way touch the chocolate. Because water is the worst enemy of chocolate, and of course it would damage your chocolate.
I like it better in a bain-marie. But if you want to use the microwave, just make sure you don’t put it on full power and put it on for 10 minutes and check it and stir it to avoid burning on the edges. as it melts, put it for less minutes until it melts completely.
The Table Tempering method
For this method, after melting the chocolate and it reached a temperature of 45/50 ‘C we separated 3/4 parts and put it on a marble table and cool it down until it reached 29’C at which point we can add the other 1/4 that we separated, still hot and this we have to raise the temperature to 35/31’C and at this temperature we already have our chocolate ready to mold. Once we have done this, we no longer have to temper it again, only if it gets too cold, heat it but to not more than 35’C.
This method could be said to be the classic one and the one that takes the longest. But I will not lie to you, for me it is the most fun!
The Seeding Temper Method
In this method, what we do is before melting our chocolate, we separate 3/4 parts and we put this part to melt. We are going to chop the remaining 1/4 part finely. Once our chocolate is melted, we begin to add the chocolate that we have chopped, we are adding it little by little until it is incorporated. And so we cool it quickly but without making a mess on the table! Less fun but if you don’t have a marble to cool your chocolate, then this method would be the correct one.
I did not write the temperatures since it has to achieve the same ones that I mentioned before.
The Mycryo Temper Method
Well, to be honest, I haven’t tried this method yet (I will! That’s for sure). But for the moment I will only tell you what I investigated about this particular method.
I found it very interesting but like everything easy and fast, it costs more money. But if you don’t have the time or the space to be able to temper your chocolate, this method will fascinate you.
What is needed for the Mycryo method is cocoa butter with only beta crystals. It comes as a powder, all you have to do is to melt your chocolate and add 1% of the Mycryo and once you incorporate it, your chocolate is ready to use!
You don’t need to see temperatures or anything like that. Well, this sounds like it’s wonderful, but I think that this method should only be used in cases where you really can’t use any of the other methods.
But I can’t wait to try it! I’ll tell you how it goes!
Direct Temper Method
There is one more method that is supposed to be the direct one. I wouldn’t trust this one much but I’m going to tell you about it anyway.
It turns out that all the chocolates are tempered from the company, on the back of the packaging it tells you at what temperature you have to put the chocolate to be able to mold it without going over that temperature. You should be able to play with your chocolate now. BUT it turns out that chocolates usually travels a long way from the company where it was made to the store where you are going to buy it. If you add to that the path that it has to travel from the store to your home or if you opt for a direct shipment to your home, there is a chance that your chocolate can be exposed to different temperatures. So if your chocolate for some reason exceeds the temperature stated on the label I think you will not be able to use your chocolate correctly using this faith method!
Now here I will leave you a table with all the temperatures for your chocolates. Remember that this is for real chocolate! And not for fake or so-called couverture chocolate.
Temperature Chart for Chocolate
| Dark Chocolate | Melt to 46/50’C
115/122’F |
Cool to 28’C
82.4’F |
Reheat to 30/32’C
86/89.6’F |
| Milk Chocolate | Melt to 40/45’C
104/113’F |
Cool to 26/7’C
80.6’F |
Reheat to 28/29’C
82.4-84.2’F |
| White Chocolate | Melt to 40/45’C
104/113’F |
Cool to 26’C
78.8’F |
Reheat to 83/30’C
84.2-86’F |
*In any case, do not forget to check the temperature that comes in the instructions for your chocolate, since each brand tells you at what temperature you should bring the chocolate.
Well, I hope you have found this to be useful information and that soon you will be encouraged to play with chocolate!
I had fun on the research path and later I’ll show you some of my work.

By Pastry Chef Rocio Navarrete
Have Fun Creating!
